I. Introduction
1. About Tutorial: How to create a stock transfer order?
2. When the inventory from warehouse A needs to be transferred to warehouse B, you can use the Stock Transfer function.
3. Before using the function, it is necessary to create a warehouse in EasyBoss. And you need to add products and inventory in the warehouse and map the platform SKU.
To use Stock Transfer, you need to create more than 2 warehouses in Easyboss.
If the warehouse is not created, you can check the tutorial: Stock-up process - create Private warehouse and shelves
II. Tutorial Details
1. Create Transfer Order
(1) Enter EasyBoss > Warehouse > Stock Transfer

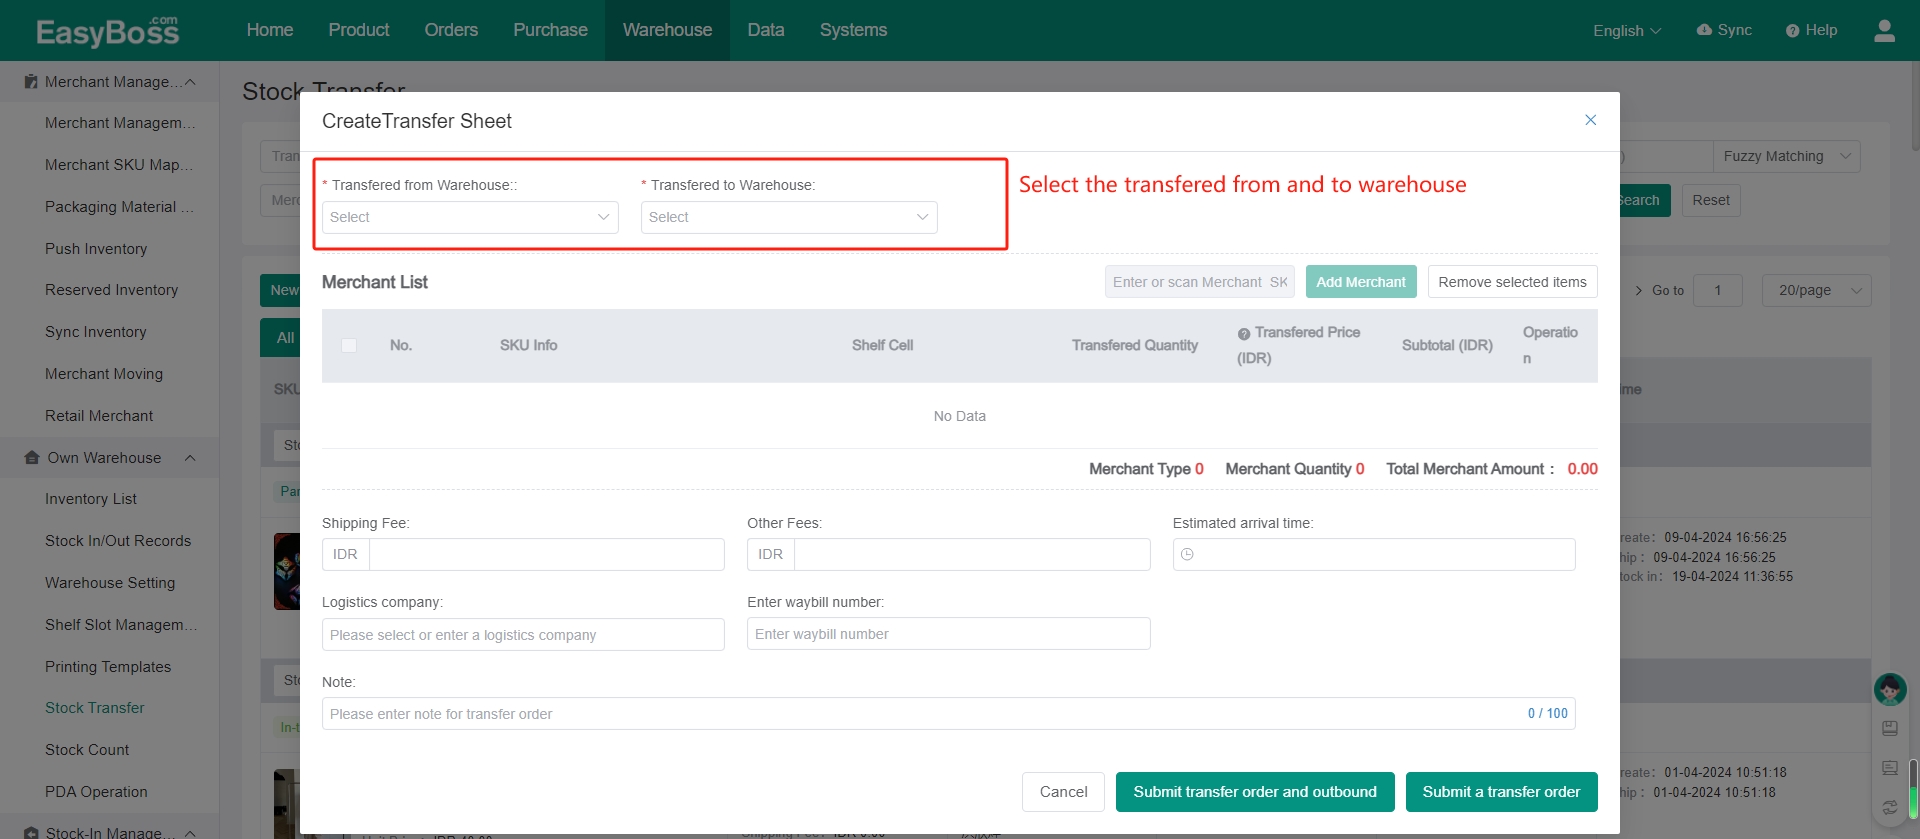
(2) Click New Transfer Order

(3) Select Transfer from Warehouse and Transfer to Warehouse in the pop-up window. The product inventory will be transferred.
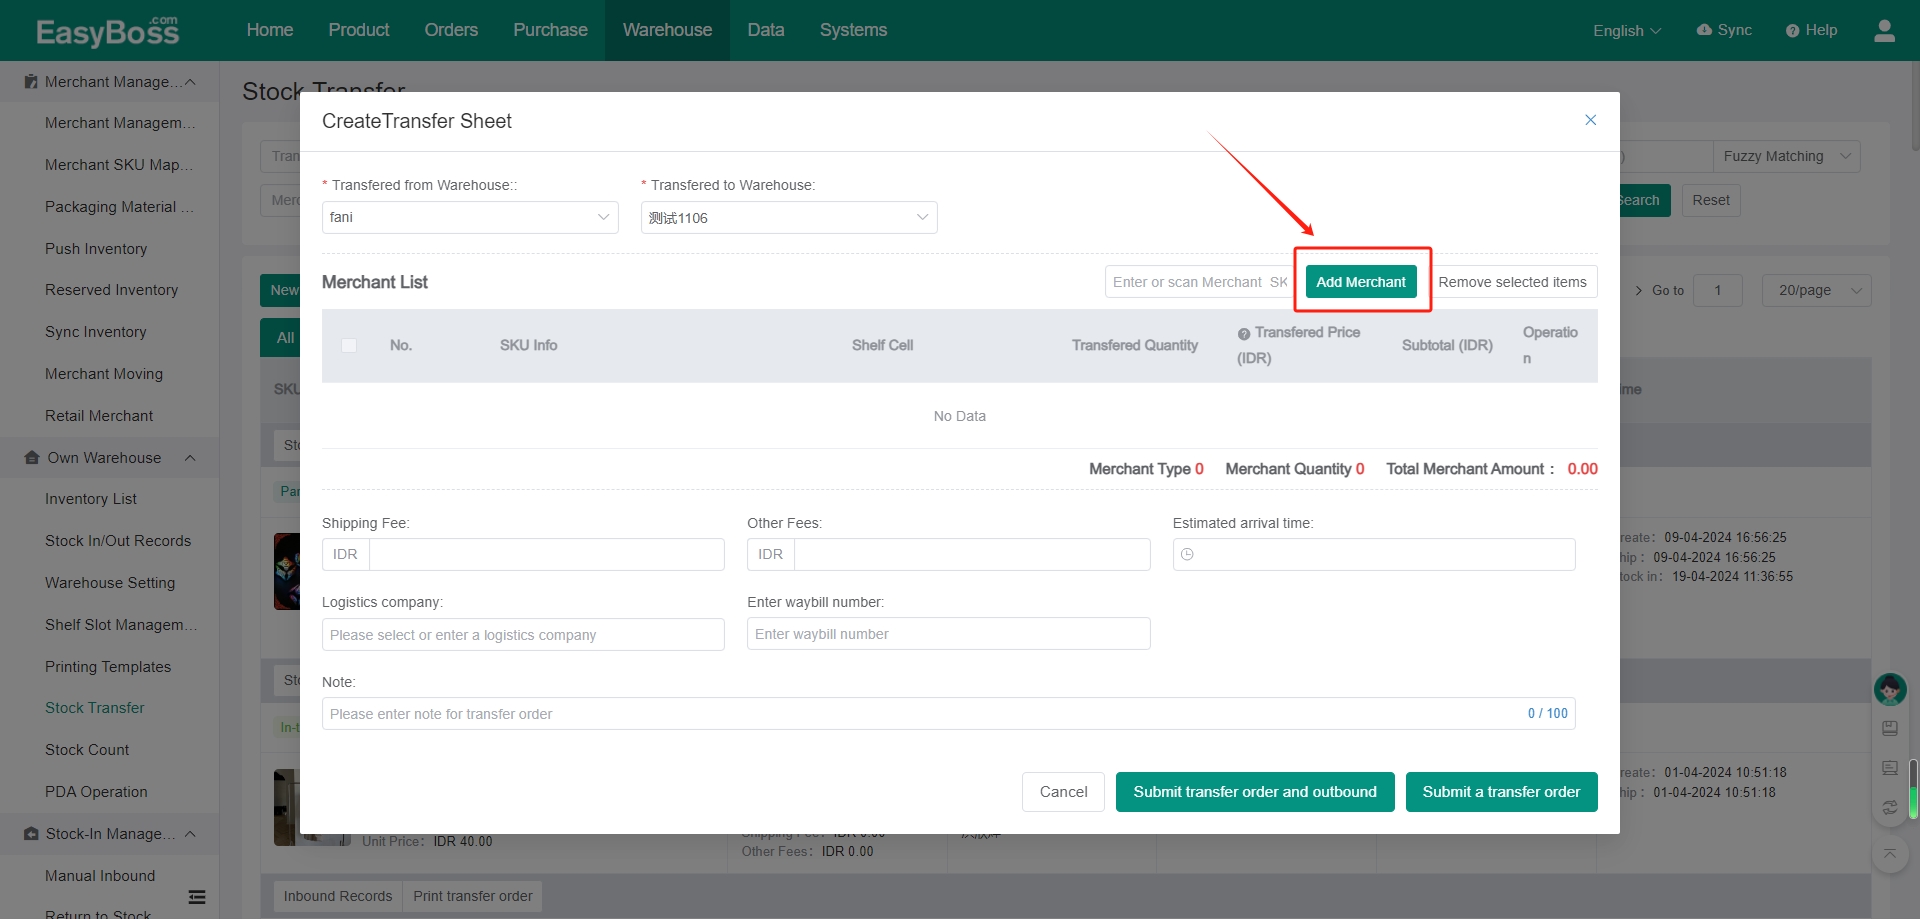
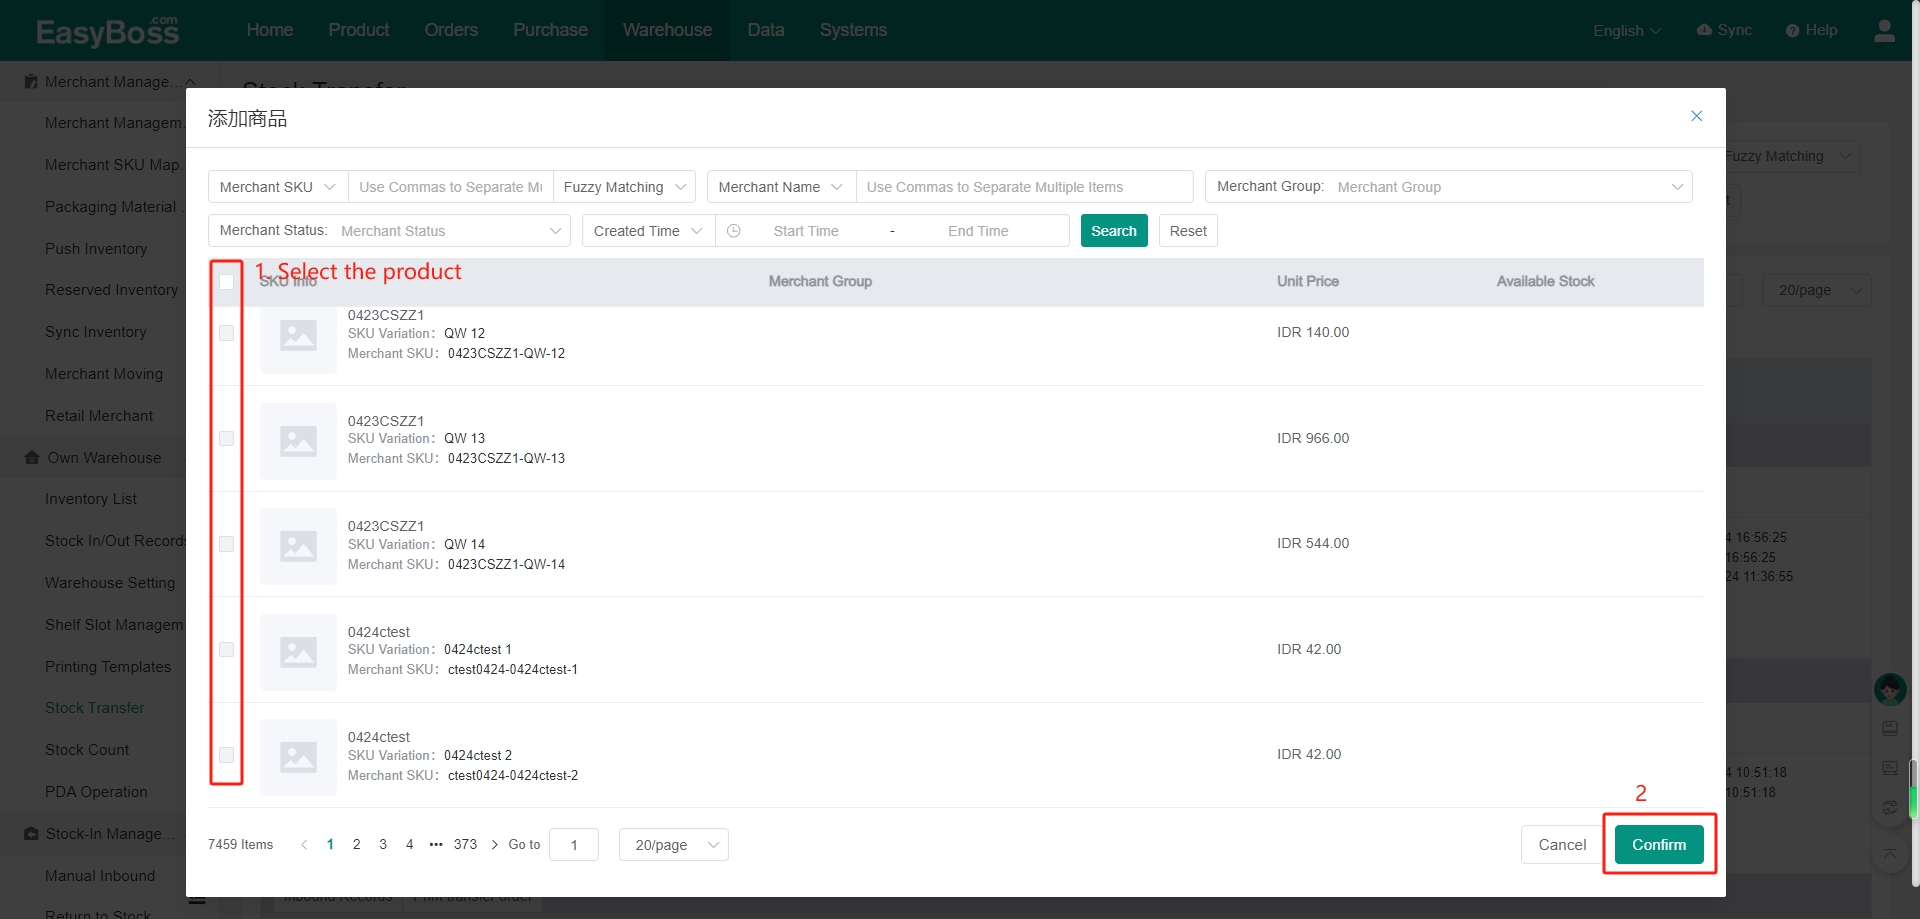
(4) Click Add Merchant > Click Confirm after checking the merchant need to transferring. The information of the selected product will be displayed in the Merchant List. You can check the SKU Info, Shelf Cell, Transferred Quantity and Price, etc. Support removing.
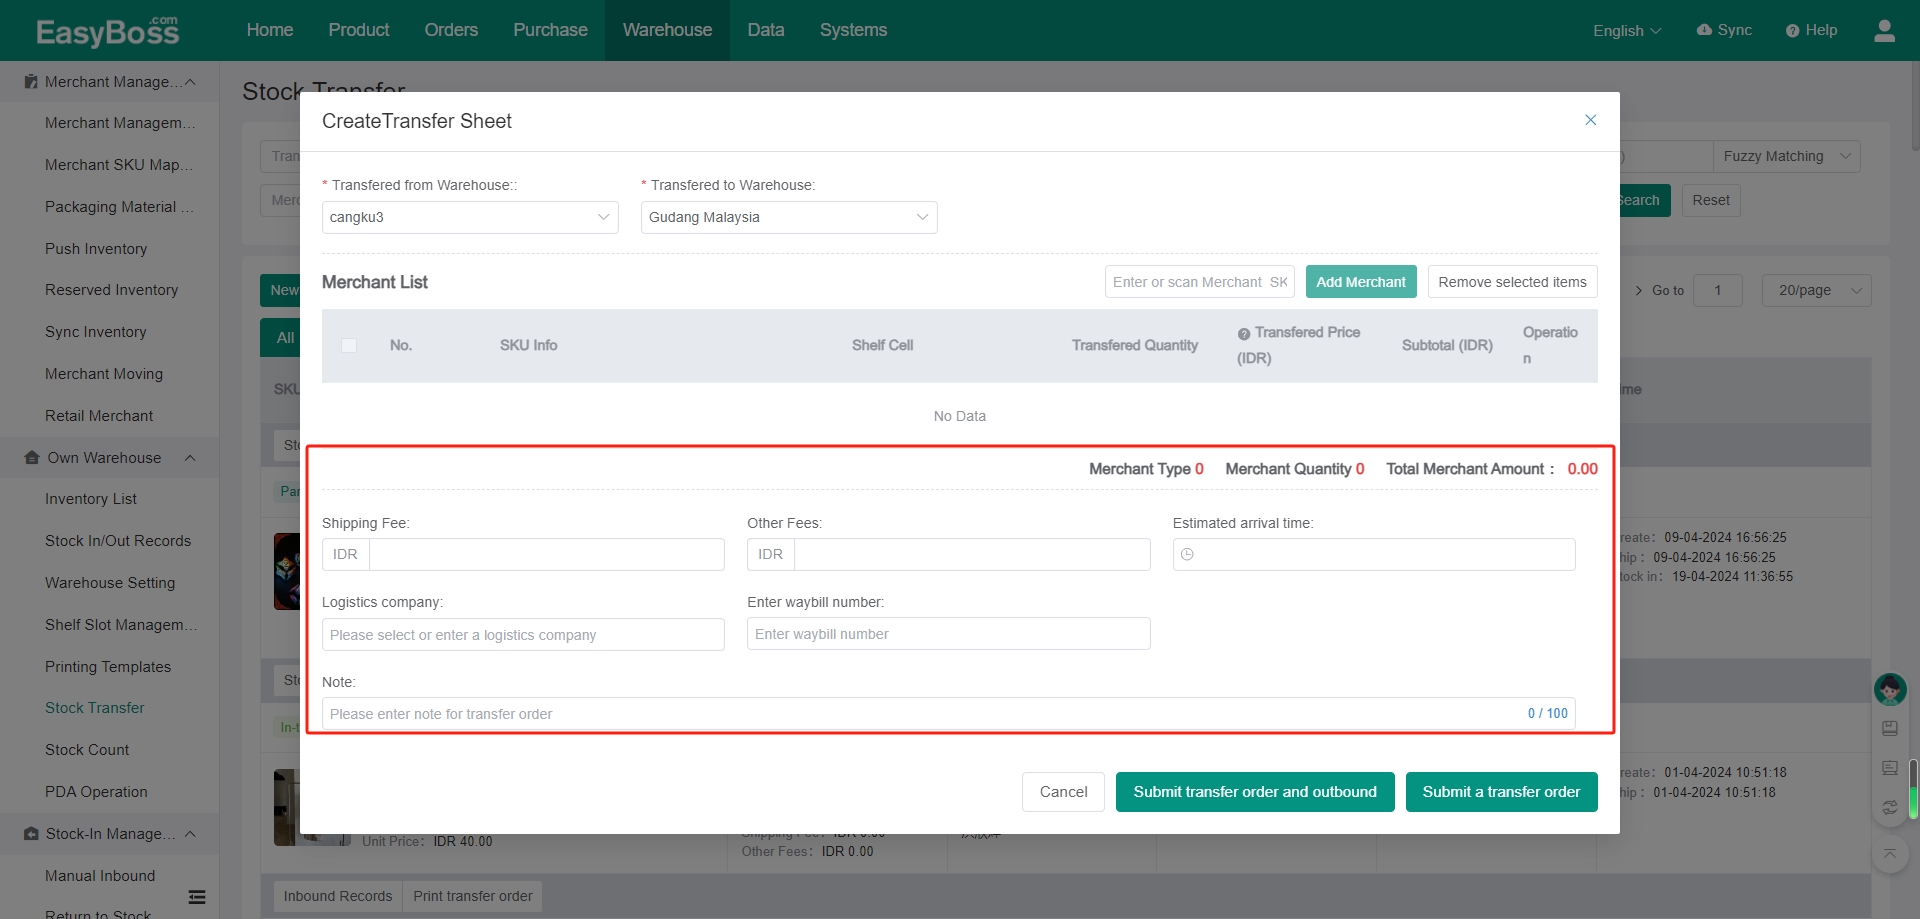
(5) Filling in the Shipping Fee, Other Fees, Estimated arrival time and Logistics company, etc according to your needs.
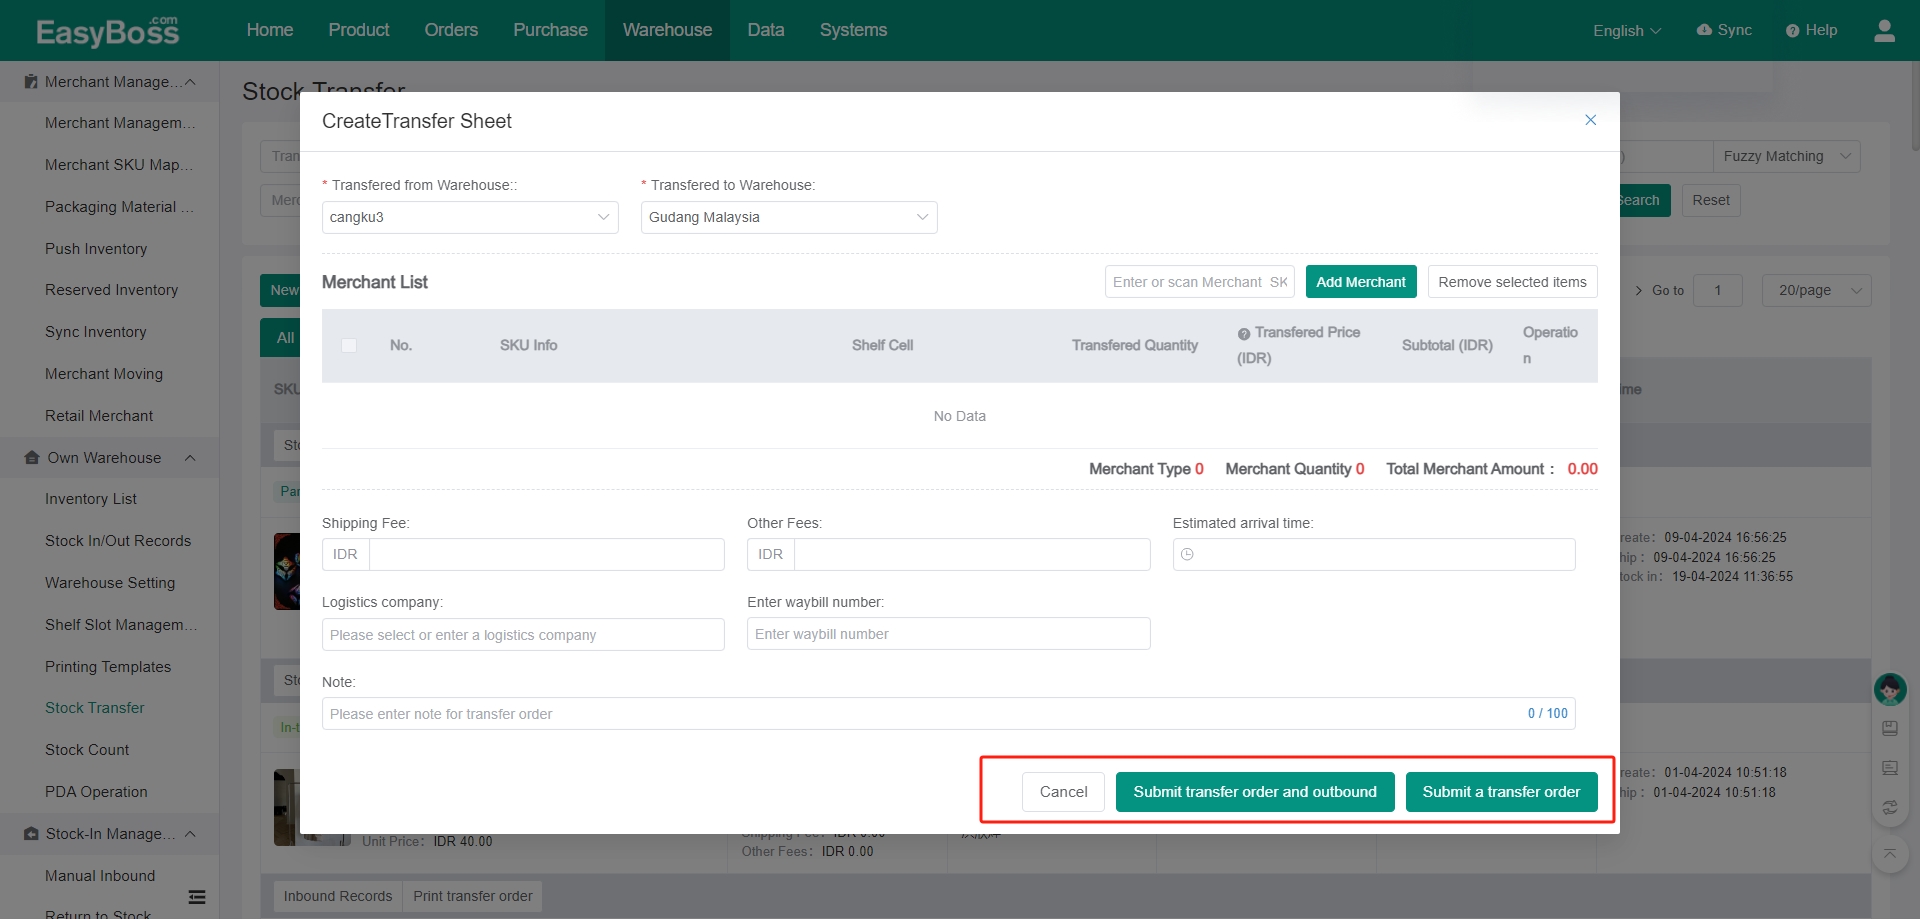
(6) After setting all, if you can click Submit transfer order and outbound, the system will generate a transfer order and automatically outbound the product. If you click Submit a transfer order, the system will generate a transfer order and save it to To Be Outbounded.
2. Transfer Order Processing
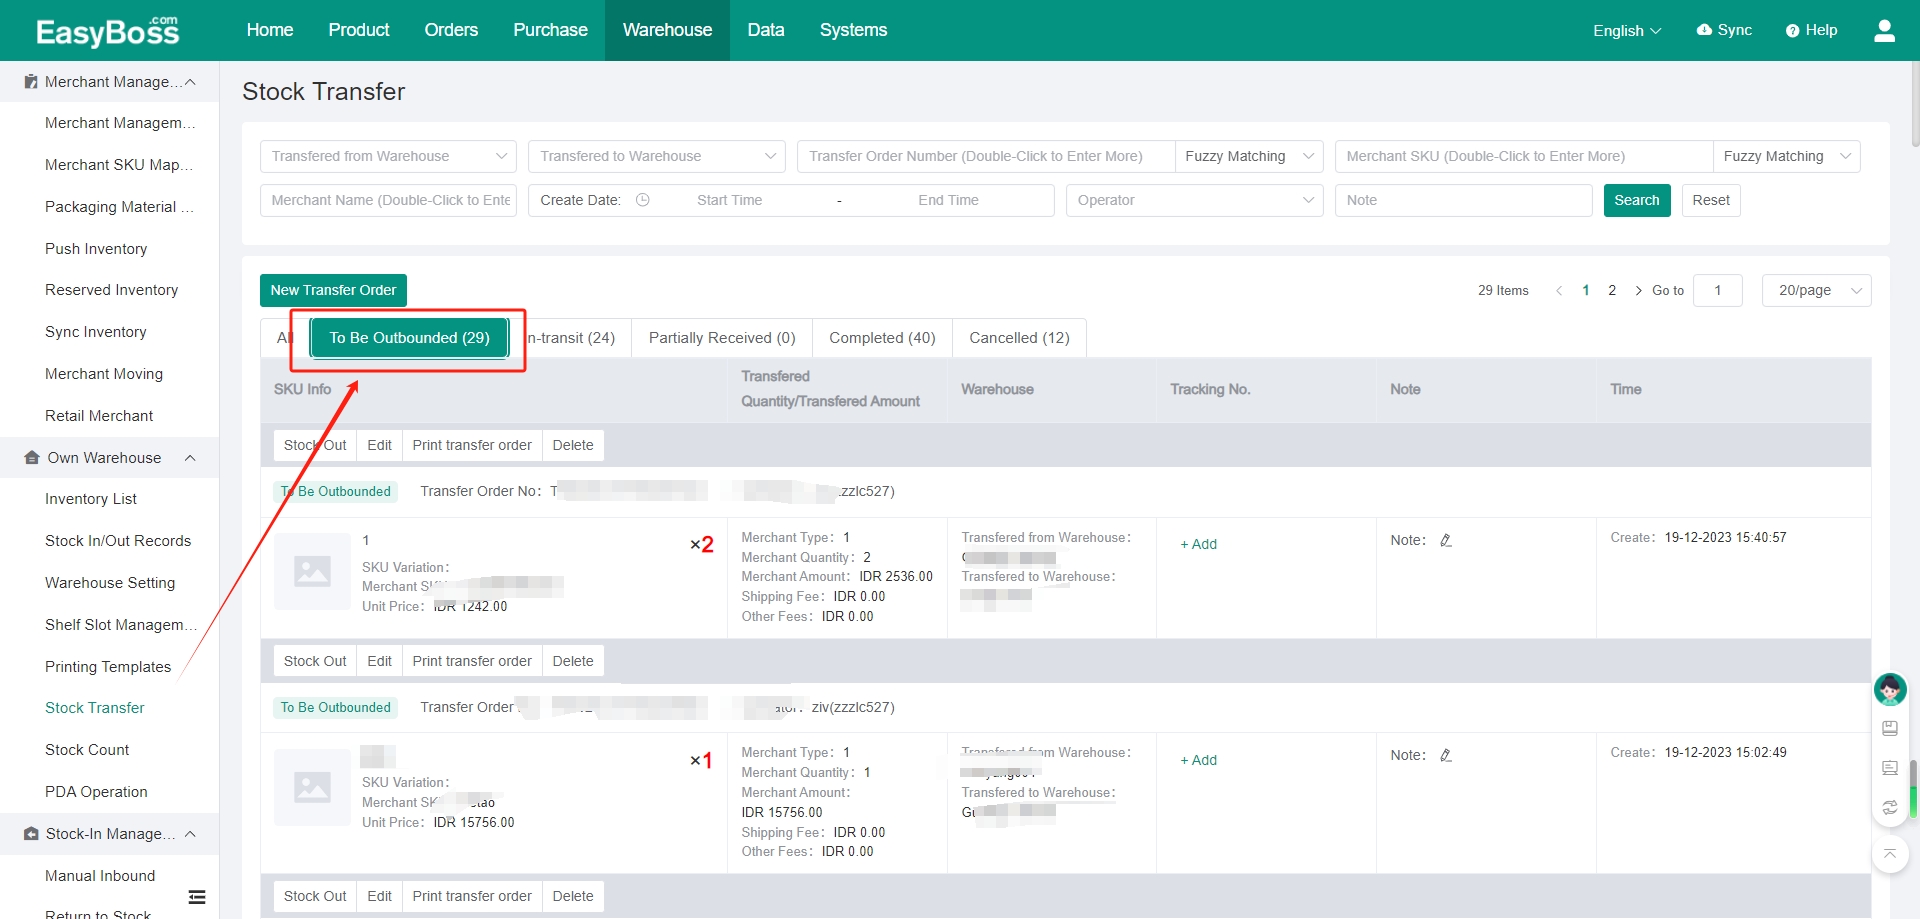
(1) In the last step, if you click Submit a transfer order, the order will be transferred to To Be Outbounded. You need to outbound manually.
In To Be Outbounded, find the corresponding transfer order.
① Click Stock Out, the system will outbound the product. And the transfer order will be moved to In-transit.
② Click Edit, you can modify the transfer order again.
③ Click Print transfer order, the print window will pop up, and the transfer order can be printed after linking the printer.
④ Click Delete, the transfer order can be directly deleted, which is irreversible.
(2) In In-transit
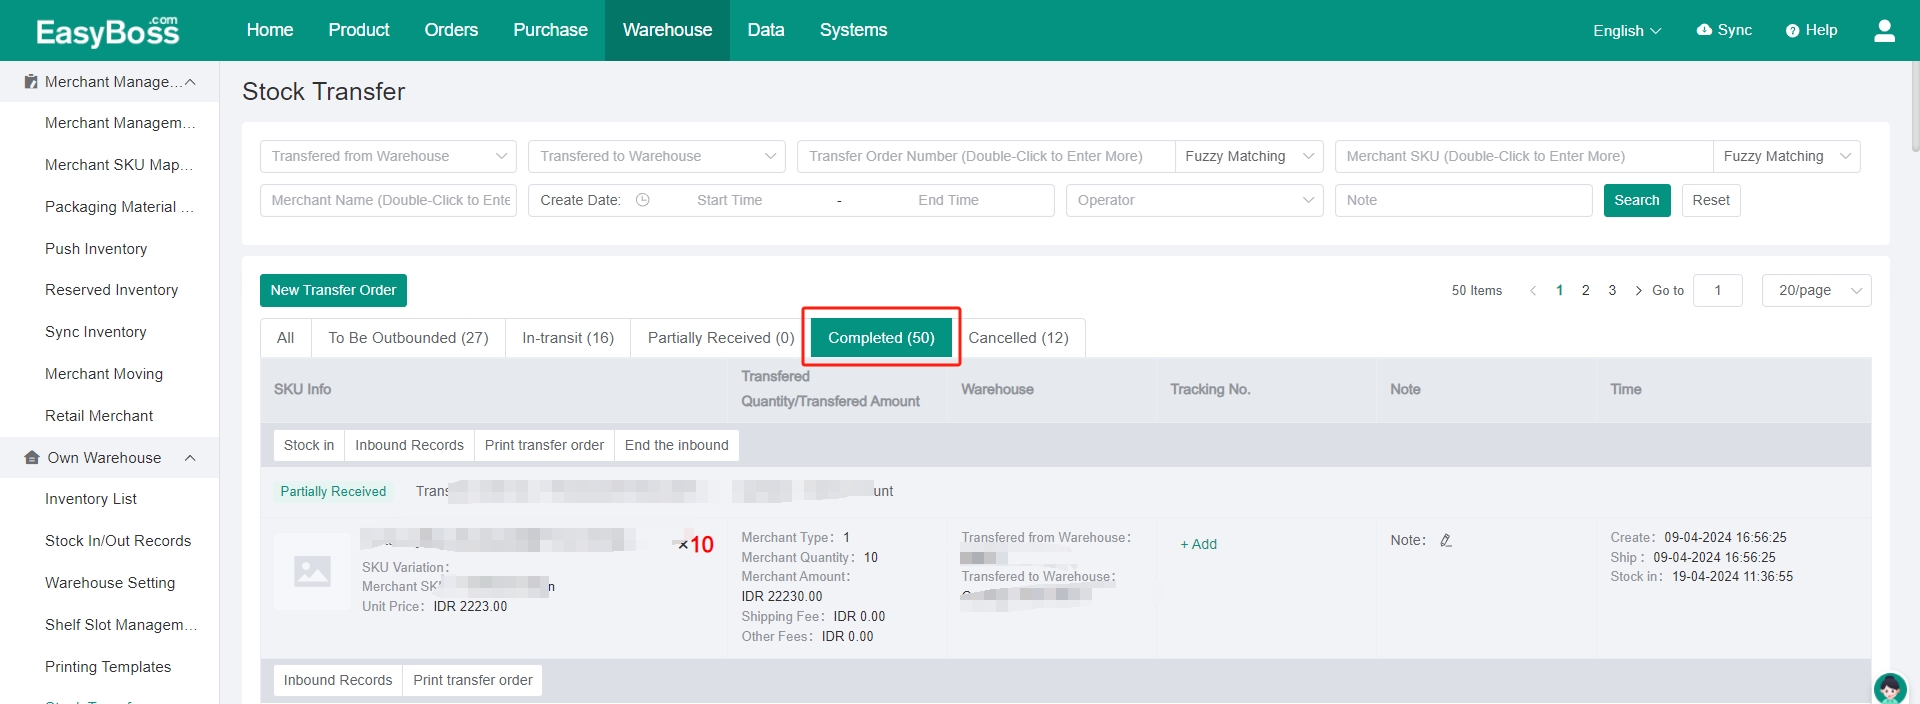
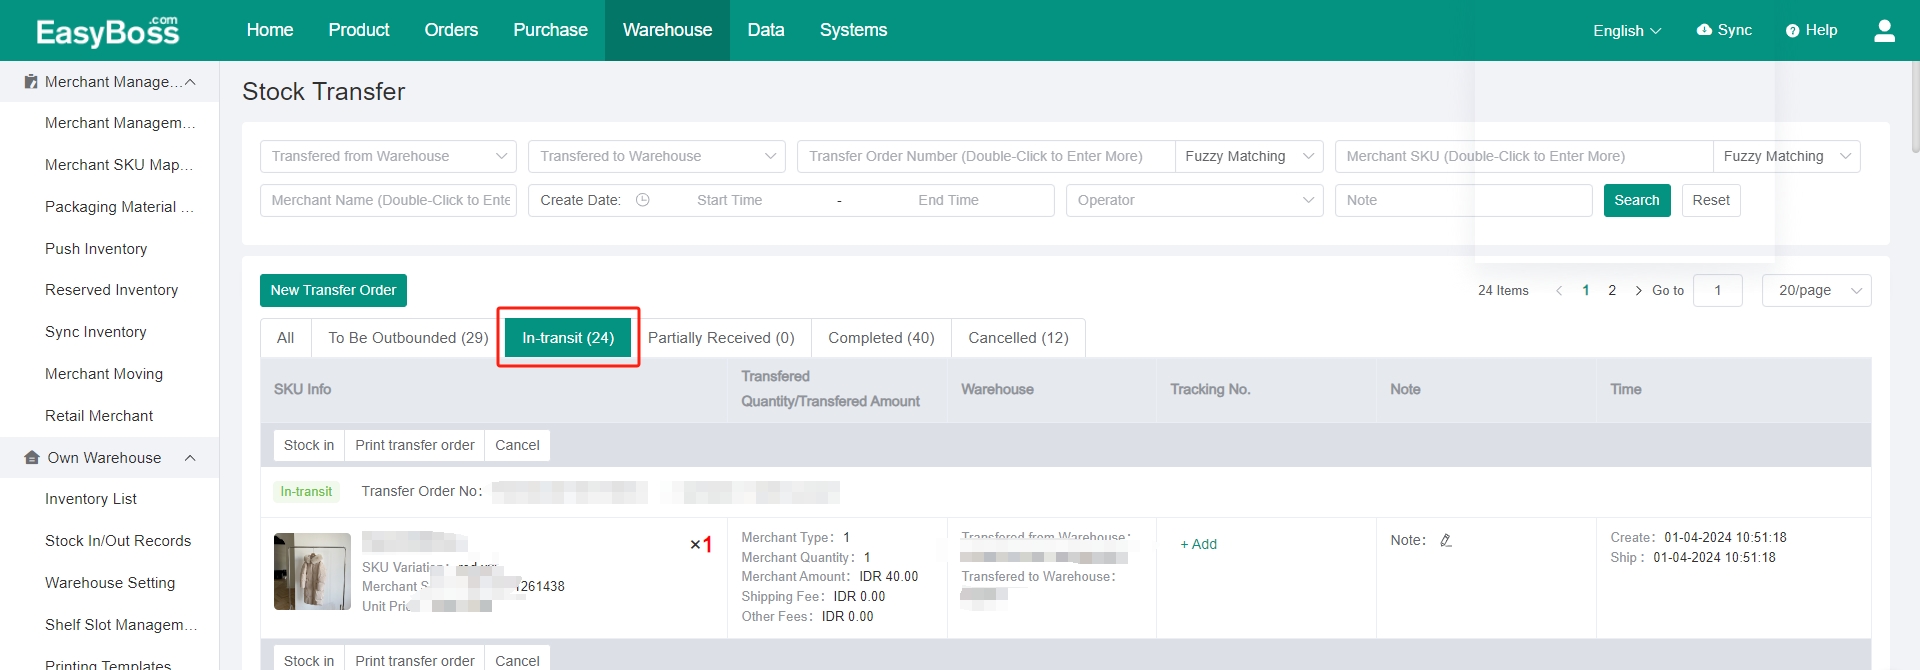
① Click Stock in, In the pop-up window, check the SKU Info, Quantity, Inbound Quantity and Shelf. After clicking Stock in, the transfer order will be moved to Completed.
When the inbound quantity is less than the transferred quantity, the system will move the transfer order to Partially Received after clicking Stock in.
② Click Print transfer order, the print window will pop up, and the transfer order can be printed after linking the printer.
③ Click Cancel, the transfer order will be canceled and will be moved to Canceled.

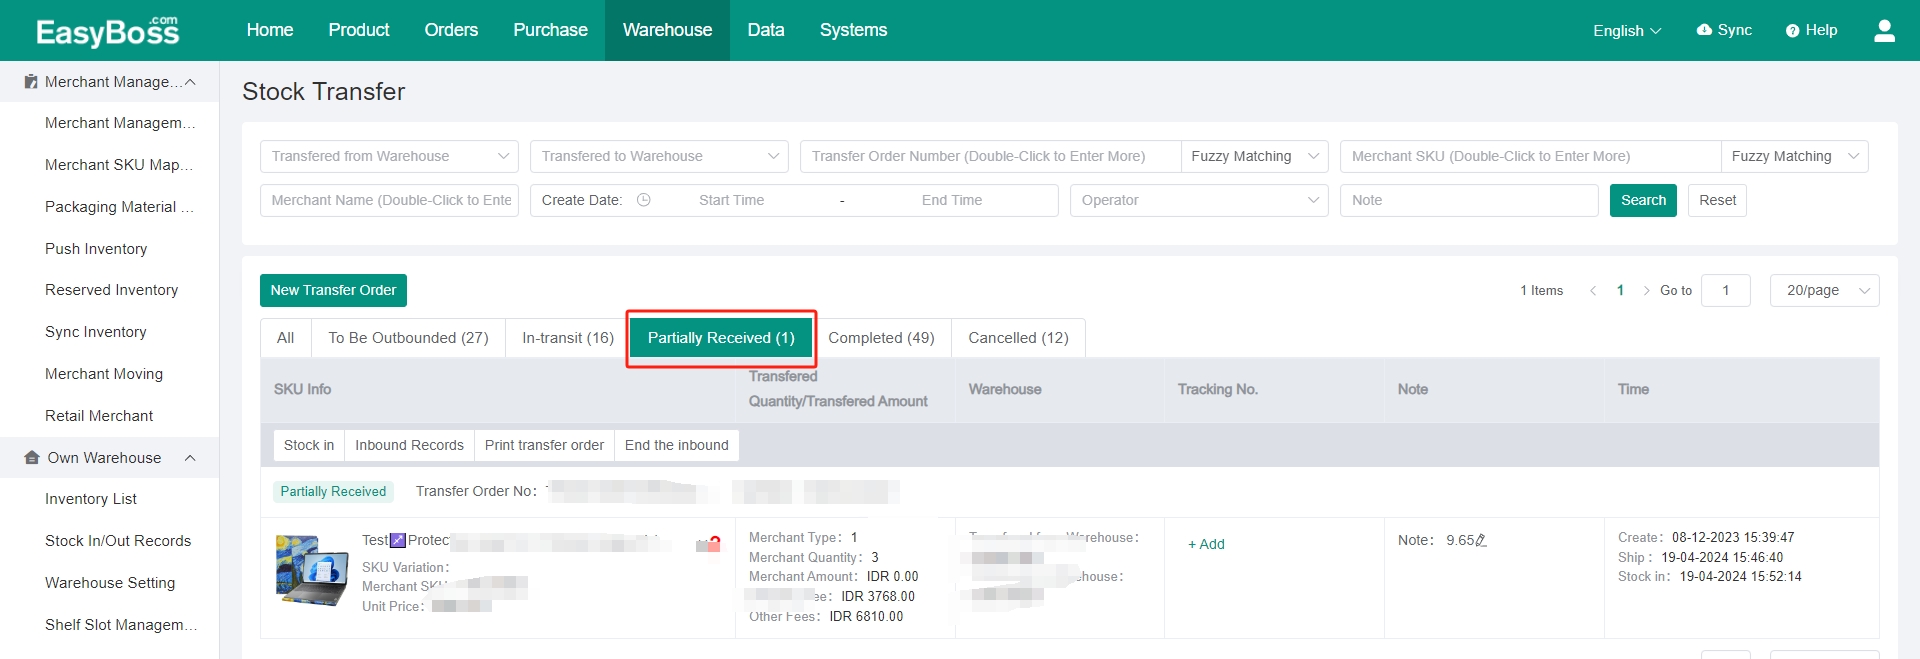
(3) In Partially Received
When the inbound quantity is less than the transferred quantity, the system will move the transfer order to Partially Received.
① Click Stock in, you can continue to inbound in the pop-up window.
② Click Inbound Records, you can view the inbound record.
③ Click Print transfer order, the print window will pop up, and the transfer order can be printed after linking the printer.
④ Click End the inbound, The In-transit inventory of the Transferred to Warehouse will be decreased, and the total inventory will be not increased. And the order will be moved to Completed.

(4) In Completed
① Click Inbound Records, you can view the inbound record.
② Click Print transfer order, the print window will pop up, and the transfer order can be printed after linking the printer.
