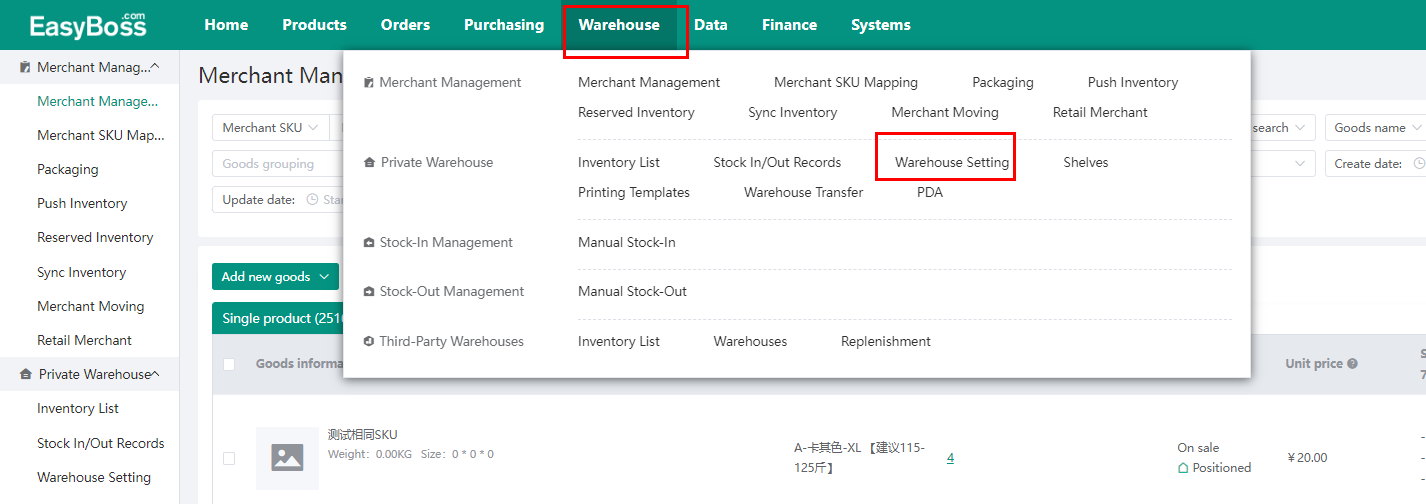
Step 1. Login EasyBoss ,click Warehouse >Warehouse Setting
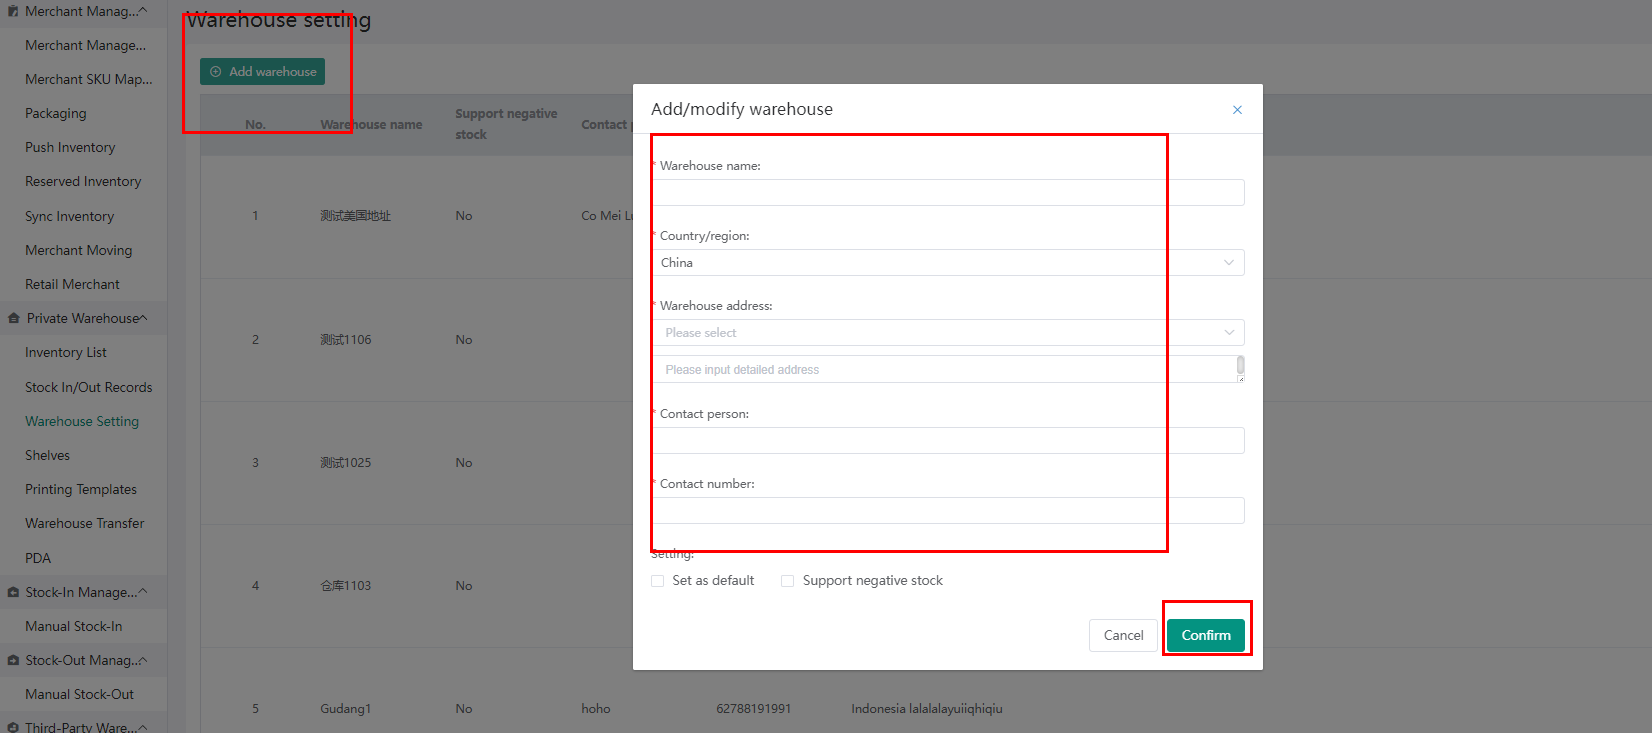
Step 2. Click Add Warehouse and enter the warehouse information in the pop-up window. * means a mandatory input field.
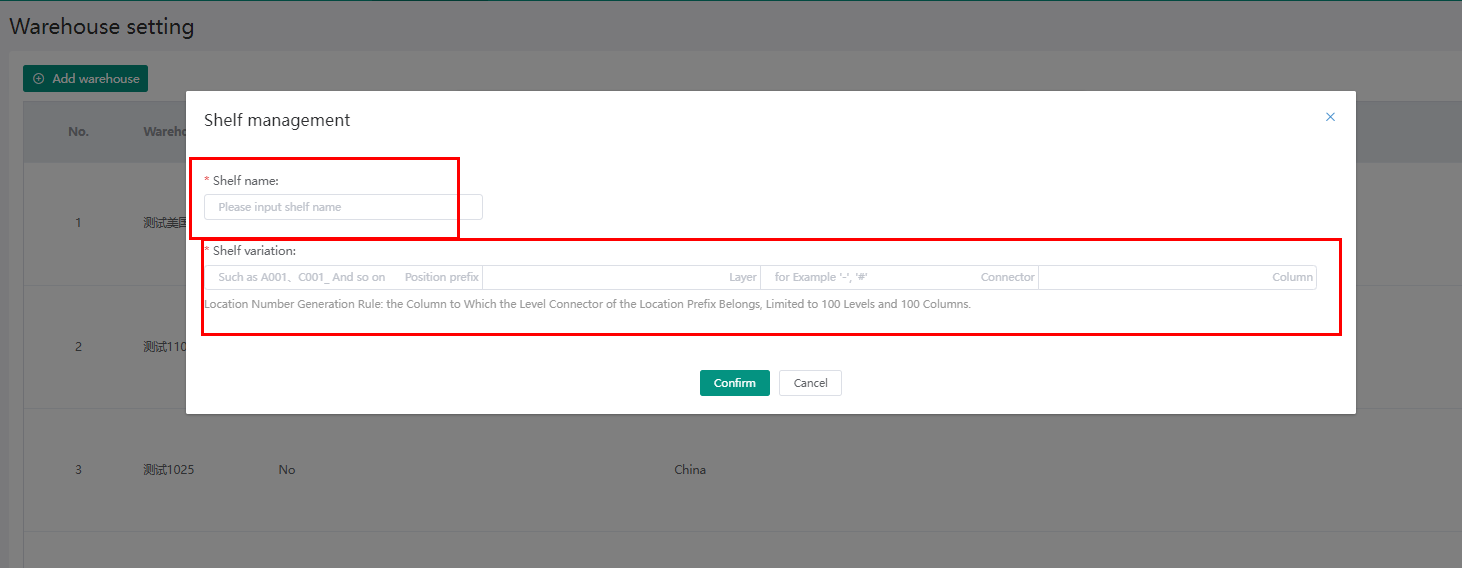
Step 3. After creating the warehouse, you can view the warehouse-related information on the warehouse settings page. Click on Shelf to add warehouse shelf spaces

Fill in the information according to your needs
Step 4. When the creating process is over, click Warehouse >Inventory list to import/export Goods. The Inventory page displays previously-placed goods.
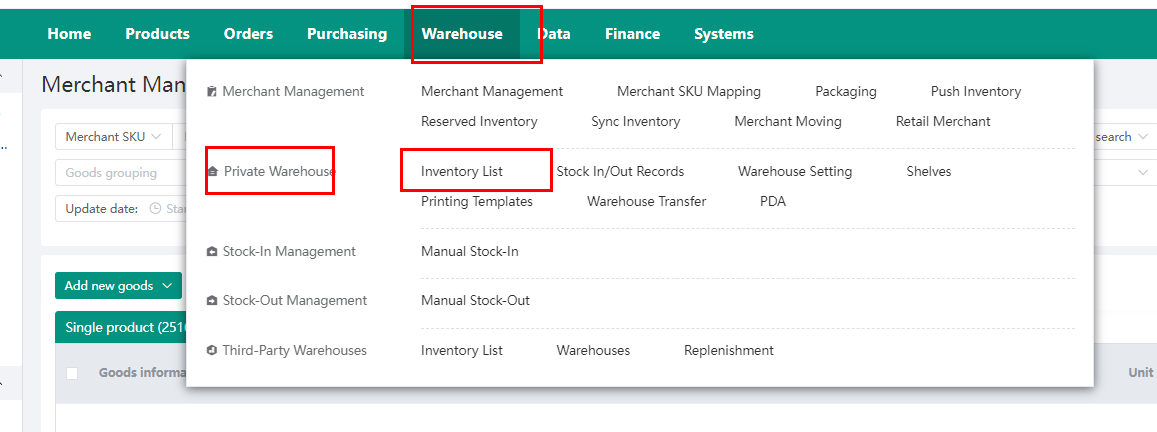
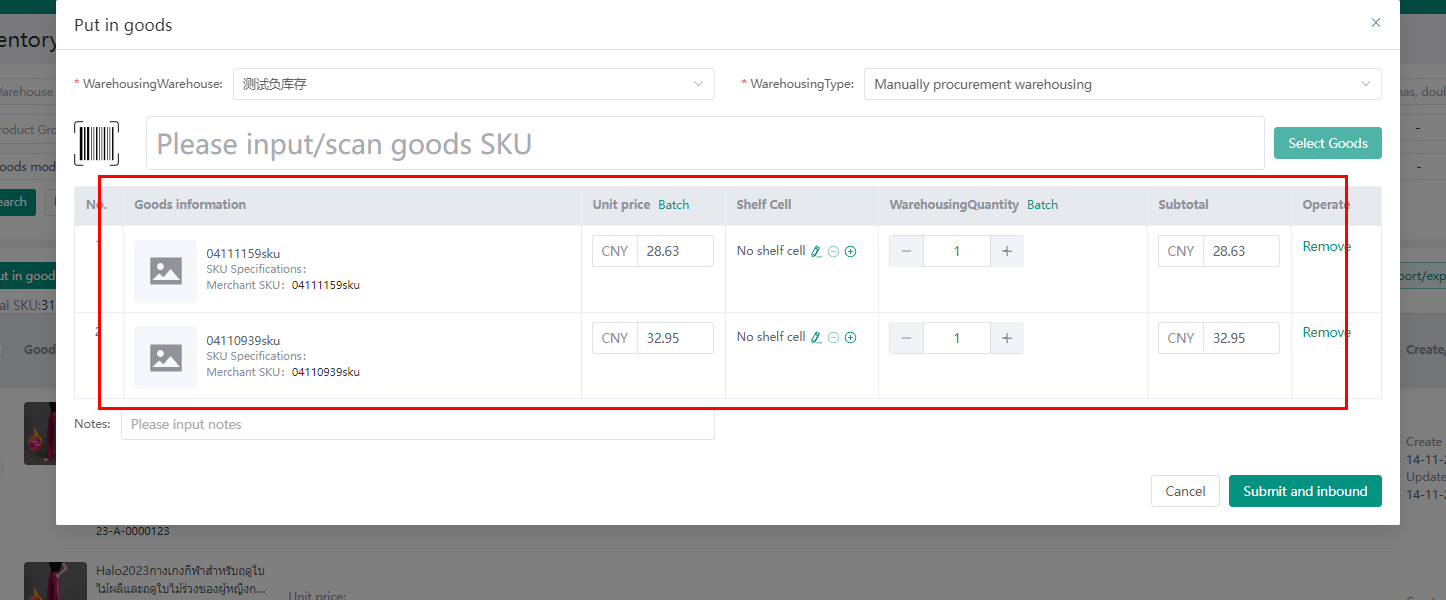
Step 5. Click Put in Goods > select warehouse and warehouse type> input or scan SKU
Note: Stock-in products need to be uploaded to Product Management first. View the tutorial here: Create Products in Product Management

Step 6. you can batch edit unit price and quantity after you finish selecting all the products. Click Submit and Inbound, indicating that now product has been recorded into the warehouse.
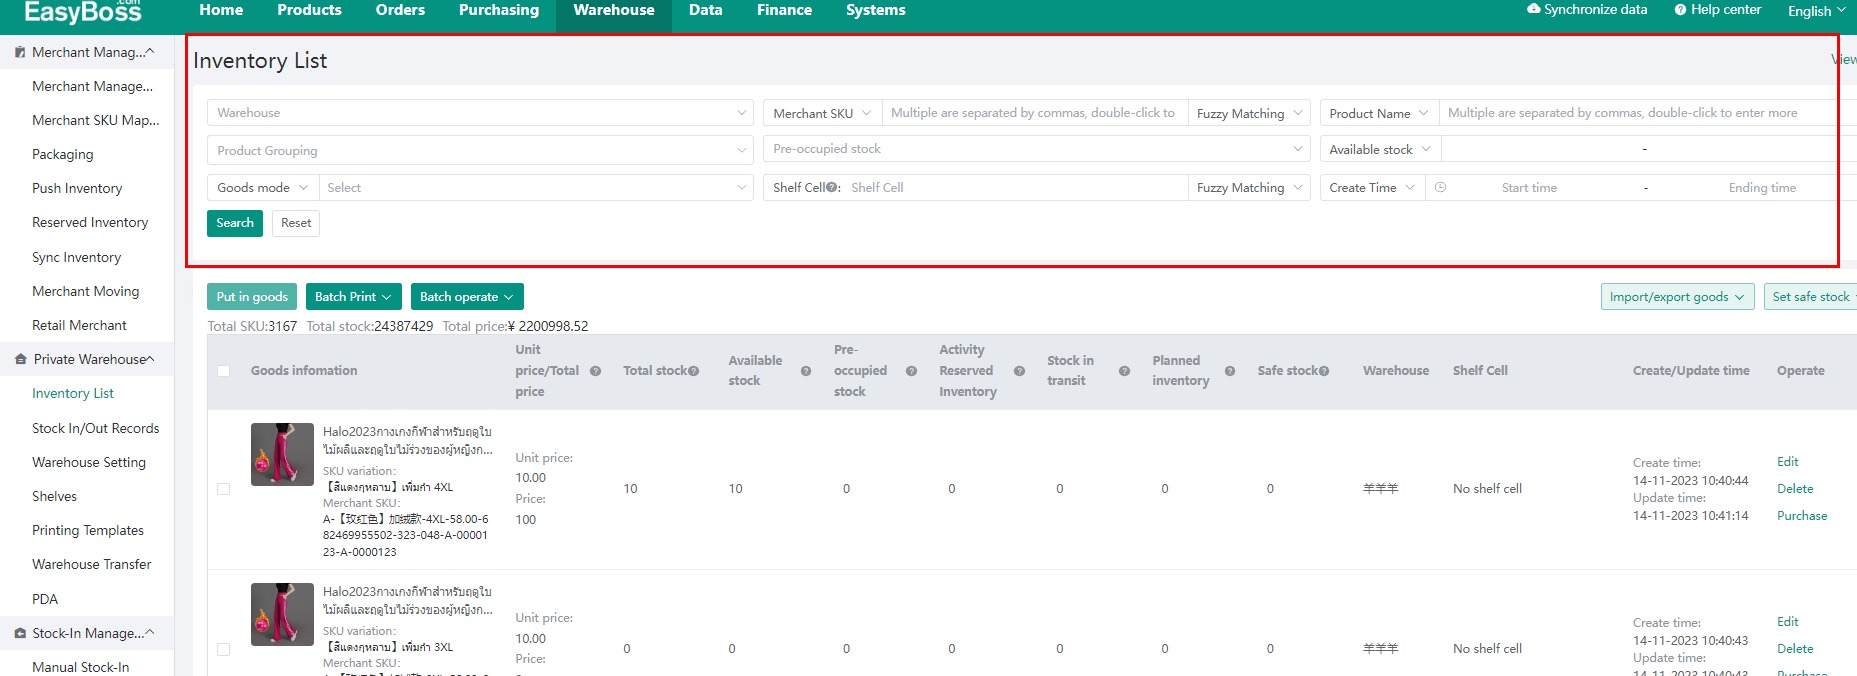
Use the filter to search for the products if you wanna find them.
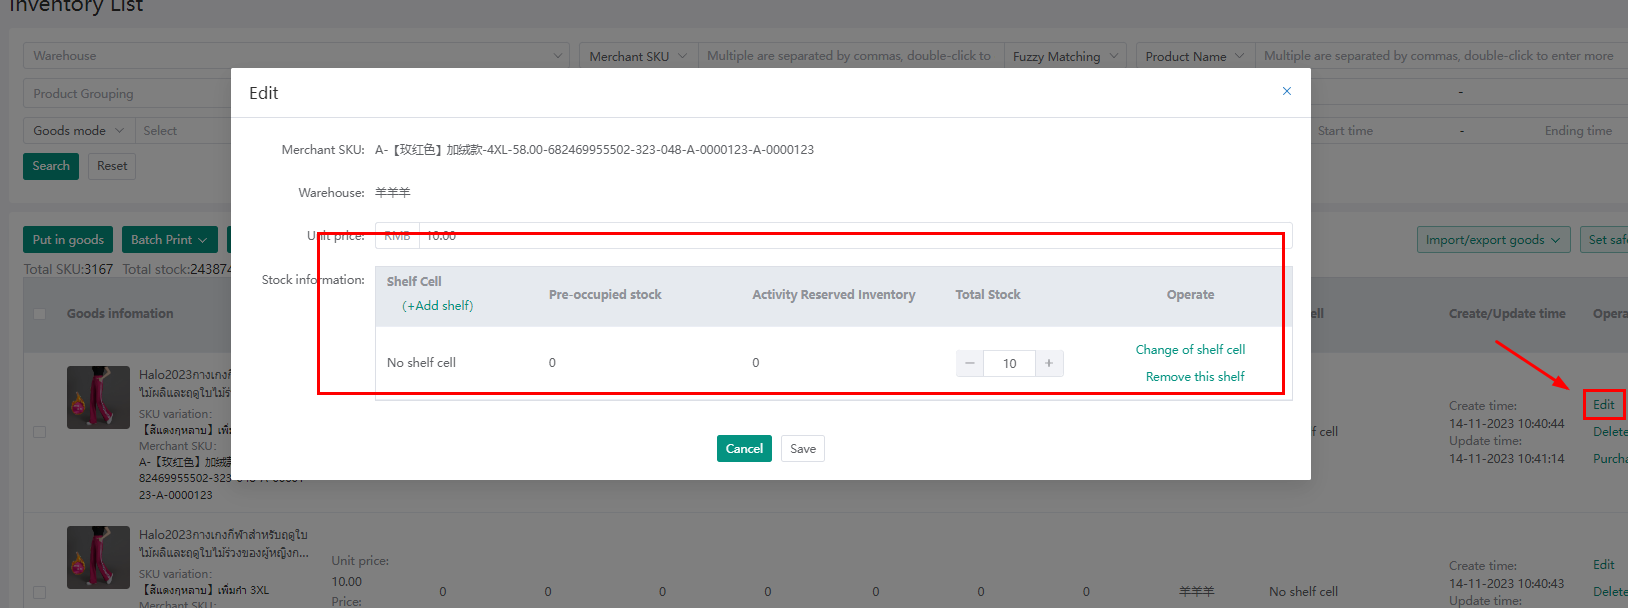
Click Edit to modify unit price, total stock and add shelf.
delete the product means you move the product out of the warehouse

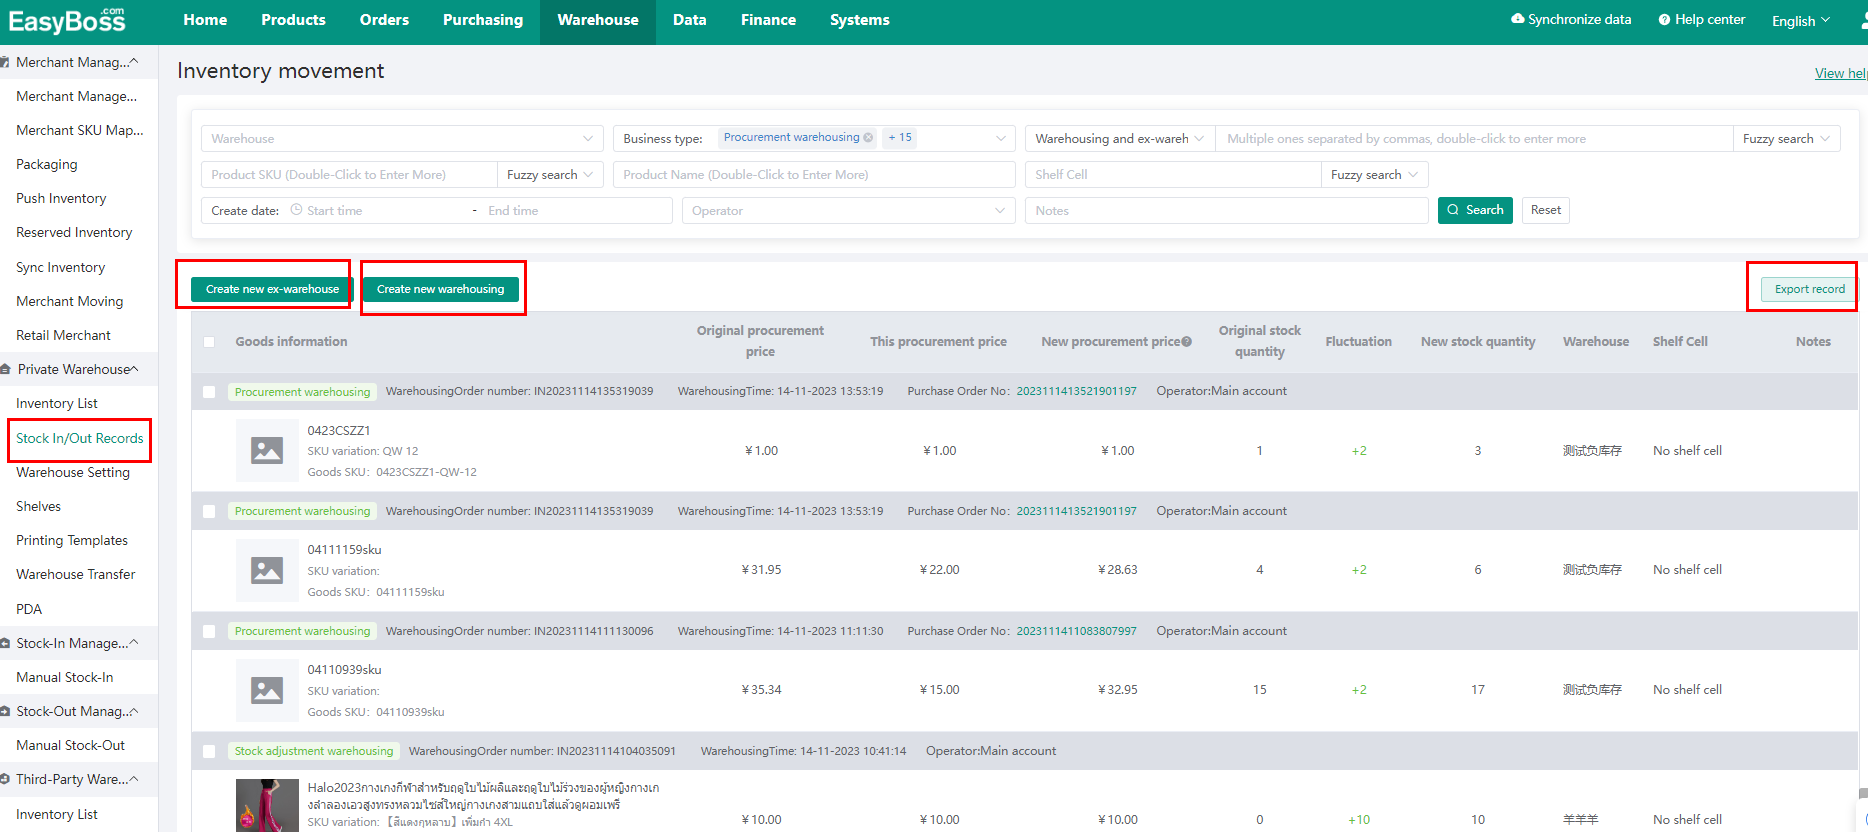
Go to Stock in/out Records to check the history
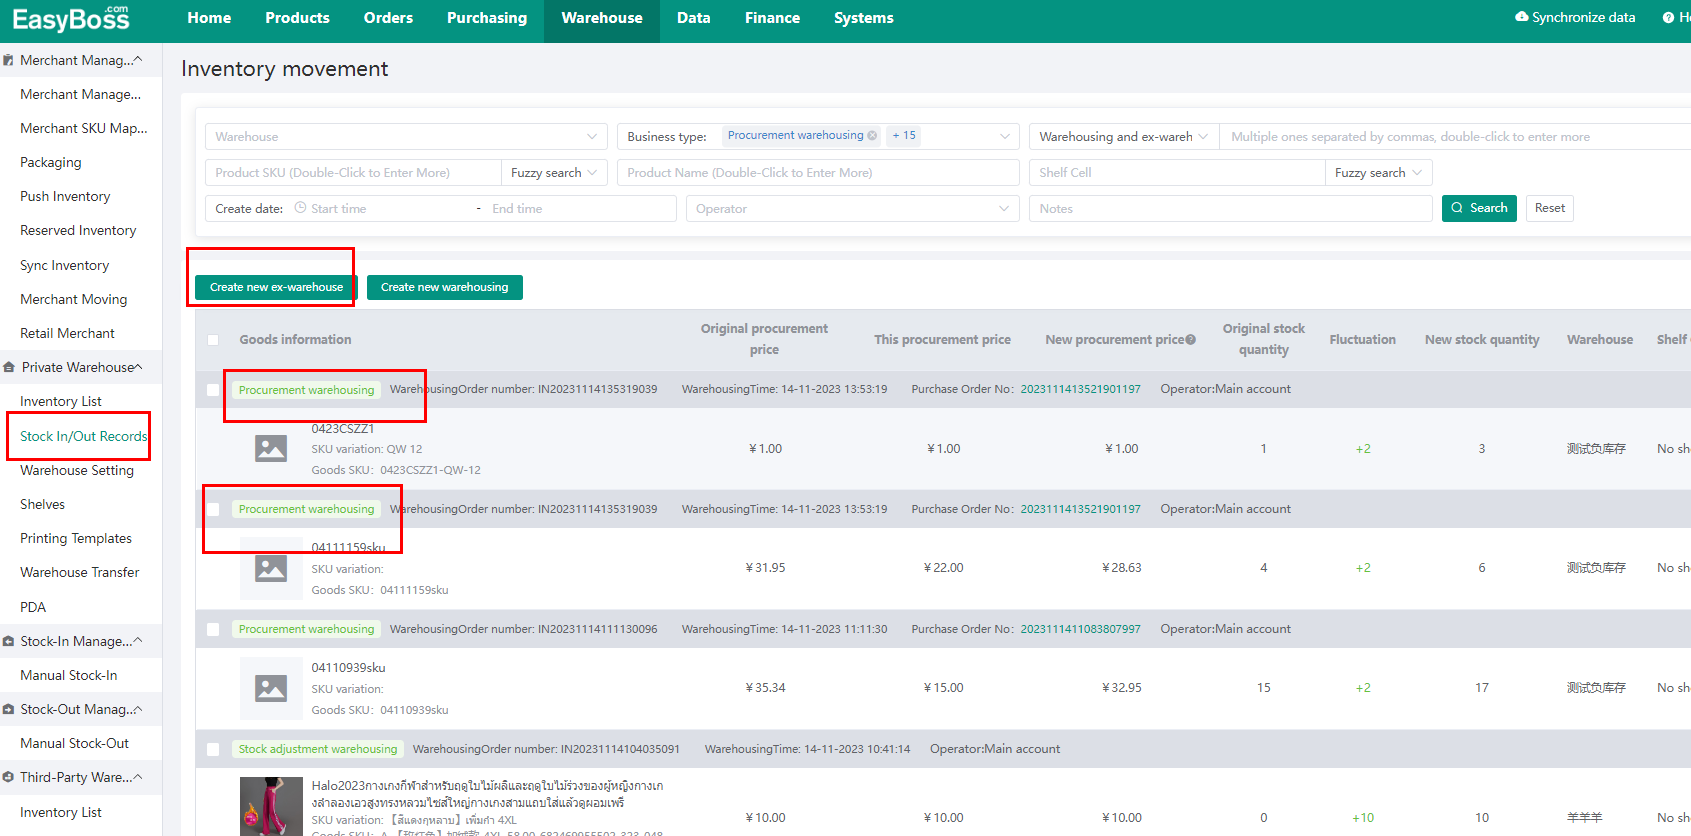
You can also Create STOCK-IN, Create STOCK-OUT, Export Record on this page.
